This guide provides practical instructions and reusable code snippets for creating layouts efficiently in the Layout Designer. It’s intended for users who want to go beyond the basics and need hands-on advice for common tasks. For an introduction to the Layout Designer, see our Introduction to Layout Designer
Best practices
Layout Sizes
- Use larger layout sizes for better image quality.
- Recommended: width above 450–500px, height above 550–600px.
- Avoid exceeding 1000px unless your layout is very complex.
Fonts in the Layout Designer
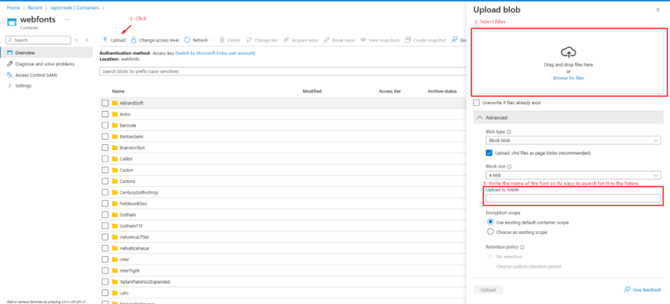
Uploading Fonts to Azure Bucket (container) - this can only be done by Raptor
- Obtain the required font files (in TTF format).
- Upload the font files to 'webfonts' container in Azure.
Using Fonts in Layouts
- Get the font’s URL from Azure Bucket
-
Add the font to your layout using a
<style>tag in the<head>section
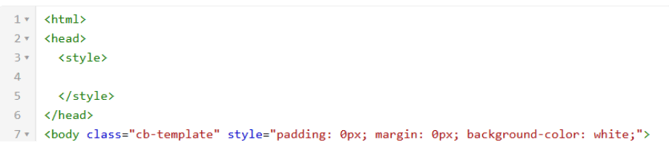
1. <head>

2.    <style>

3.

4.    </style>

5.  </head>

6.
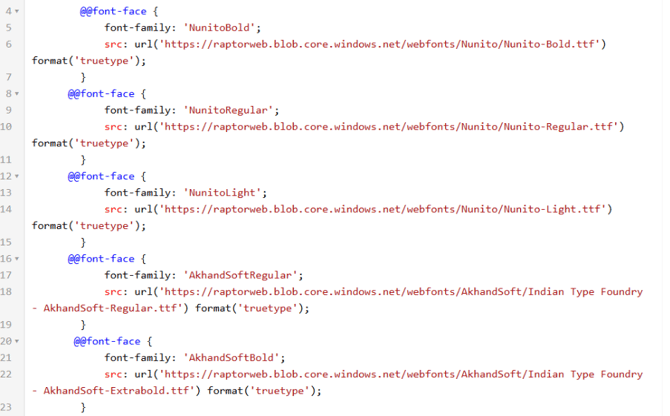
3. Use the font in your CSS:

1. @@font-face {

2.             font-family: 'RobotoBold';

3.             src: url('https://raptorweb.blob.core.windows.net/webfonts/Roboto/Roboto-Bold.ttf') format('truetype');

4.         }

5.
You can add multiple fonts as long as each has a unique name.
4. In order to use it, simply write the font-family: "Name of the font";

1. font-family: 'NunitoBold', 'Arial', sans-serif;
Product Images
To center and scale product images, use this snippet (adjust width and height as needed):

1. <div style="text-align: center; height: HEIGHT_TO_UPDATE; width: WIDTH_TO_UPDATE;margin: 0 auto; background-image: url(@Model.ImageUrl); background-position: center center; background-size: contain; background-repeat: no-repeat;"></div>

2.
Price Formatting
A built-in function handles most price formatting needs, including decimals, currency, and culture. By default, the price will show two decimal points, if any, and use Danish culture with “,-“ - eg. "95,95,-" . Usage example:
@FormatPrice(@Model.OriginalPrice)
@FormatPrice(@Model.OnSalePrice, priceFormat: "N3", capRoundPrices: false)
Arguments:
priceFormat: Number of decimals (e.g., "N2" for 2 decimals)uiCulture: Culture code (default: "da-DK")capRoundPrices: Show decimals only if needed (default: true)leadingChars/trailingChars: Add text before/after price (default trailing: ",-")
Calculating Sale Percentages
If your data feed doesn’t include a discount percentage, calculate it like this:
double FormatPercentage(double? onSalePrice, double? originalPrice) {
    if(onSalePrice == null || originalPrice == null) return 0f;
    if(originalPrice.Value == 0) return 0f;
    var percentage = -(int)(((onSalePrice.Value - originalPrice.Value) / originalPrice.Value) * 100);
    return percentage;
}
Usage:
@FormatPercentage(Model.OnSalePrice, Model.OriginalPrice)%
Conditional Display (Rules)
Show elements based on data conditions, e.g., only display a splash if a field has a value:
@if(!string.IsNullOrEmpty(@Model.CustomField1)) {
  <div class="status-message-box">
    <div style="display: table-cell; vertical-align: middle; text-align: center;">
      <p class="status-message-box--text">@Model.CustomField1</p>
    </div>
  </div>
}
Splash Snippets (examples)
Circular splash
<div style="width: 130px; height: 130px; background-color: @myBackgroundColor; border-radius: 100px; display: table;">
  <div style="display: table-cell; vertical-align: middle; text-align: center;">
    <p style="font-size: 32px !important; color: @myTextColor; font-family: 'Arial', sans-serif; text-align: center; margin: -5px 0 0 0 !important;">MY TEXT GOES HERE</p>
  </div>
</div>
Rectangular splash
<div style="background-color: @myBackgroundColor; color: @myTextColor; font-family: 'Arial', sans-serif; font-size: 20px; padding: 10px 16px; border-radius: 1px; text-transform: uppercase;">
  MY TEXT GOES HERE
</div>
Outlined splash
<div style="background-color: transparent; border: 1px solid @myBorderColor; color: @myTextColor; font-family: 'Arial', sans-serif; font-size: 20px; padding: 10px 16px; border-radius: 1px; text-transform: uppercase;">
  MY TEXT GOES HERE
</div>
Tips
- Use unique font-family names for each font.
- Keep layout sizes reasonable for best results.
- Use the provided functions and snippets to speed up your workflow.
Quick Links