Raptor's Customer Data Platform (CDP) integrates with Criteo. Using the CDP, it is possible to synchronize audiences to Criteo for advertisement use. Here is how to set up the integration.
Setting up Criteo and attaching audiences from the Raptor CDP
1. In the Activations-menu, hit the ‘Create new activation’ button.

2. Select Criteo from the list of apps.
3. Fill in a name and select a Person Identifier from the drop-down menu. Adding a description is optional. The Person Identifier you use will largely depend on what identifier you are using in your data inputs. Click ‘Next’ to move on to the next step.
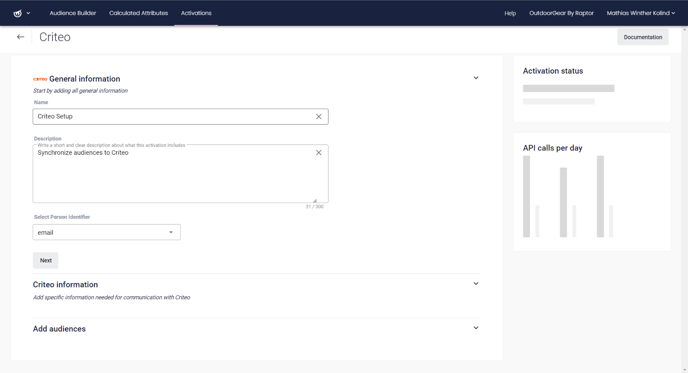
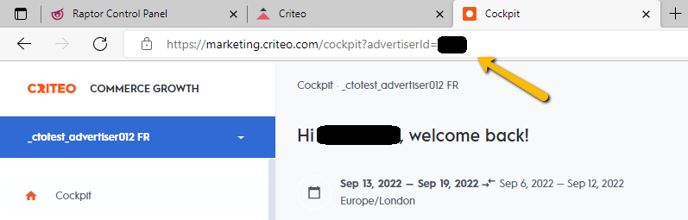
4. Next, you must fill in two pieces of information specific to Criteo. Firstly, your Advertiser ID, which is most easily found by accessing your Criteo Account and looking in the address-line.
Secondly, you must fill in the Identifier Type that depends on the campaign you are linking to in Criteo. It must simply match what you've selected in Criteo and what you have selected as Person Identifier in step 3. When both fields have been filled out, click Next.
5. You may attach one or more Audiences to your Activation. Simply click on ‘Select audience’ to see a full list of all established Audiences, and check the box next to the desired entries. Selected Audiences can be removed again by clicking on the ‘Remove’ button next to each entry.

When the desired entries have been added, click ‘Save’
Warn⚠️Pressing Save will start validation of the information you provided. After a few minutes, an error message saying that consent has not been provided will pop up.
Contact Raptor to provide consent and finalize setup of Criteo
6. In order for Raptor's systems to access your Criteo account, permission for this must be given on the account-level. In order to finalize the setup, it is necessary to contact Raptor Professional Services directly at support@raptorservices.com or phone number +45 3136 7298.
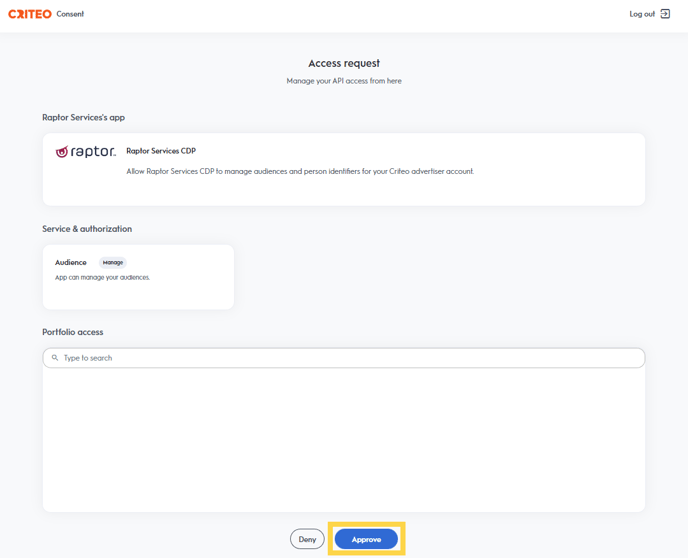
7. After you have been in contact with Raptor, you will receive a validation URL. Copy this into your browser, and log in to your Criteo account.
8. You will now be able to provide consent to Raptor Services by clicking 'Approve'
The setup is now finalized and your audiences should start synchronizing to your Criteo account. Please contact Raptor if you have any questions.
🔍 Note: If you delete the linked Audience from Raptor's systems, it will also be deleted from Criteo.