Heyloyalty
Introduction
Raptor's Customer Data Platform (CDP) integrates with Heyloyalty. From the CDP, it is possible to synchronize audiences to Heyloyalty for advertisement use.
When a person enters/leaves an Audience or a Calculated Attribute changes values in Raptor's CDP, the Heyloyalty activation is automatically updated in real-time.
Setup
1. Enter general information in Raptor
In Raptor you will find a template created to assist the integration setup. To create the Heyloyalty Activation, go to “Customer Data Platform --> Activation --> Create New Activation --> Heyloyalty.
Type in Name, Description and select the preferred person identifier - in Heyloyalty this will generally be the "Email" - and click Next.
2. Heyloyalty information
To establish communication between Heyloyalty and the CDP, you need the following information:
- API key
- API secret
- List ID
🔍 Note: Keep this browser page open through the whole setup
3. Find information in Heyloyalty
First, you need to find the API key and API secret for the Raptor integration - fortunately, they're in the same place.
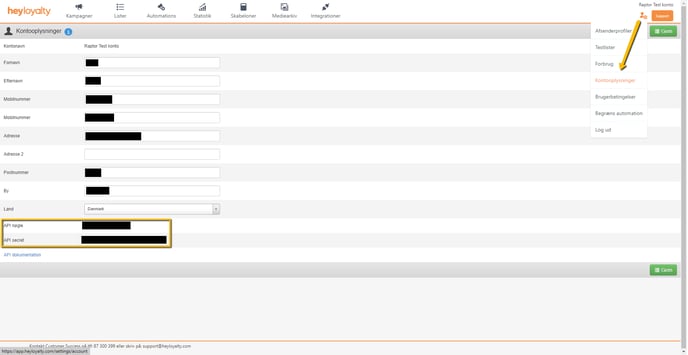
In your Heyloyalty account, mouse over the symbol in the upper-right corner to open the user-menu, and select Kontooplysninger - account information. At the bottom of the resulting info-screen, you will find both the API Key and API Secret. Copy these to the relevant fields of the Activations interface.

Next, you need to select the List that you wish the Raptor CDP to sync with, and copy its List ID. To do this, navigate to the Lister section using the top menu, and select the List you want to use. The URL displayed by your browser at this point will contain the relevant ID.
Simply copy the number as shown, and paste it into the List ID field of the Activations interface.
As for the E-Mail address, this is simply used to send error-reports and similar information. Enter one that is appropriate for your uses. Once all fields have been filled, simply click Next.
4. Add Audiences and/or Calculated Attributes
At the bottom of the page, you can attach an audience. and/or Calculated Attribute.
- Click Select audiences in order to attach audiences to your Heyloyalty account.
- Click Select calculated attributes in ortder to attach calculated attributes.
- After you have chosen an Audience and/or Calculated Attribute, click Apply.
🔍 Note: Consider starting with one audience – you can always attach more later.
Now hit Save to finalize the activation, and wait 5 minutes for the sync to take place - the Activation should then be up and running!
Note on Heyloyalty Integration
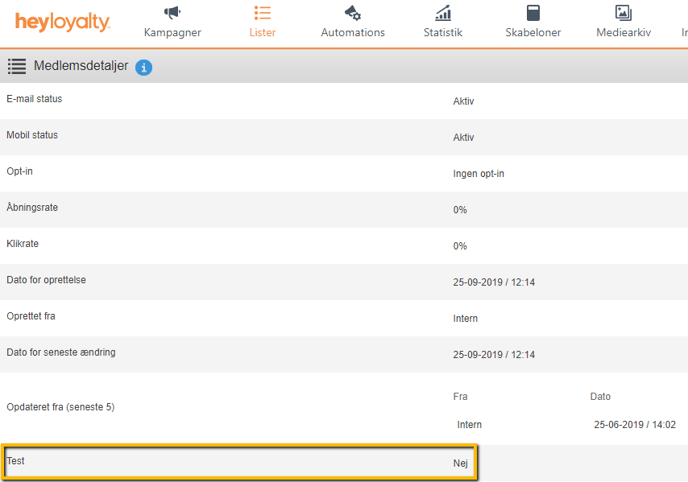
Once a Heyloyalty list has been integrated with the CDP, new fields will appear for any person on said list - one for every Audience or Calculated Attribute added to the Activation. These will show whether the person in question is part of the Audience/Attribute.

In this case, the individual is on a list that has been linked with an Audience named 'Test', but is not part of said audience.
🔍 Note: If you delete the linked Audience from Raptor's systems, the relevant Audience Label within Heyloyalty will be automatically changed to 'Audience Removed by Raptor CDP'.