Klaviyo
Raptor's Customer Data Platform (CDP) integrates with Klaviyo. From the CDP, it is possible to synchronize audiences to Klaviyo.
Setting up Klaviyo and attaching audiences from the Raptor CDP
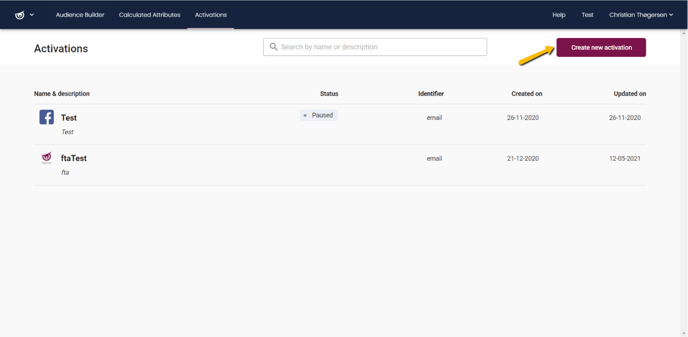
1. In the Activations-menu, hit the ‘Create new activation’ button.
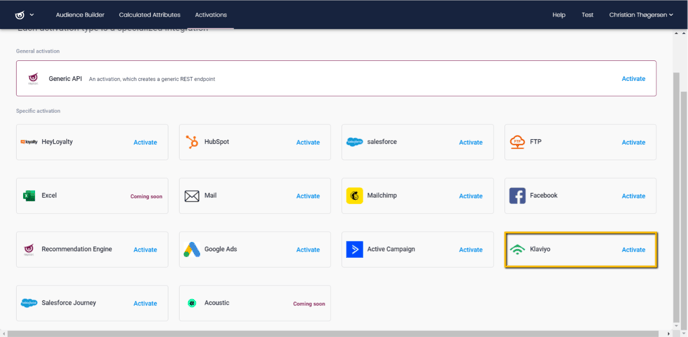
2. Select Klaviyo from the list of apps.
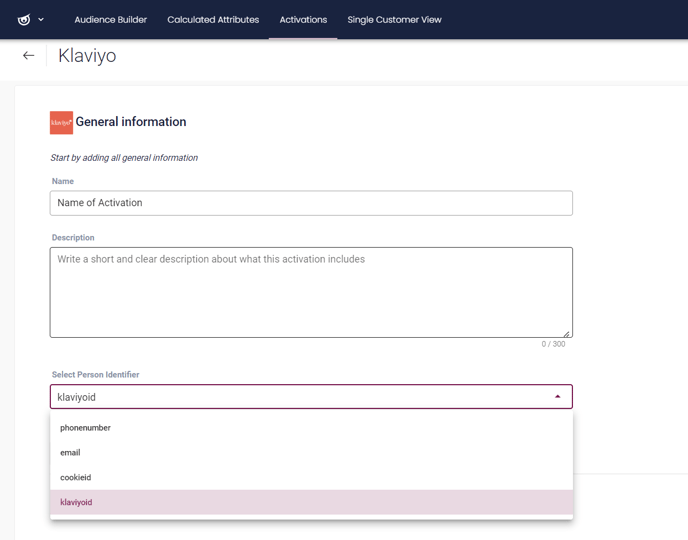
3. Fill in a name and select your Klaviyo ID as the Person Identifier from the drop-down menu (note: the Klaviyo ID must be ingested as a person identifier through the Data Manager to appear in the drop-down menu). Adding a description is optional. Click ‘Next’ to move on to the next step.
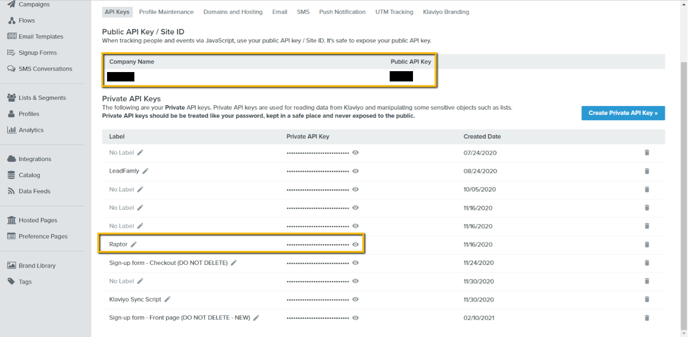
4. Fill in the Private API Key. This is obtained from your Klaviyo account, by going to the ‘Account’ view, then selecting Setting → API Keys.
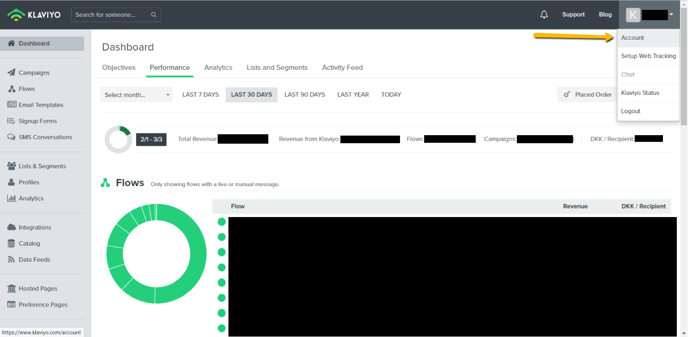

In this view, you can view your company’s Public API Key at the top, as well as see and copy a list of Private API Keys and create more as needed. Copy the Private API Key that you have created for connecting your Klaviyo account to Raptor and insert it into the activation setup page in the Raptor Control Panel.
Once the Private API Key field has been correctly filled out, click on ‘Next’ to proceed to the final step.
5. You may attach one or more Audiences to your Activation. Simply click on ‘Add audience’ to see a full list of all established Audiences and check the box next to the desired entries. Selected Audiences can be removed again by clicking on the ‘Remove’ button next to each entry. When the desired entries have been added, click ‘Save’ to finalize the Activation.

Your newly created Activation will now appear on the Activations overview, and automatically go live after a five-minute technical delay.
🔍Note: If you delete the linked Audience from Raptor's systems, the relevant List will be deleted from Klaviyo.