Schemas are a vital part of the creation of dataflows, as they translate your data to fit it to the structure that Raptor system expects. They can be altered and crafted during the dataflow creation process, and the list of your available schemas is available via the 'Schemas' button in the top-bar or the 'Edit Schemas' button on the Welcome-screen.
Likewise, Sources play an important role in categorizing and directing your dataflows, and can be viewed via the 'Sources' button in the top-bar or the 'Edit Sources' button on the Welcome-screen.
You can easily navigate between these two views and the Dataflow overview at any time using the top-bar.
1. Schemas
The Schema Overview provides a number of useful features. A search-bar at the top lets you filter the list as needed, while the action-button at the right-hand side of each line lets you delete schemas that are not in use, or clone them to a sister account.
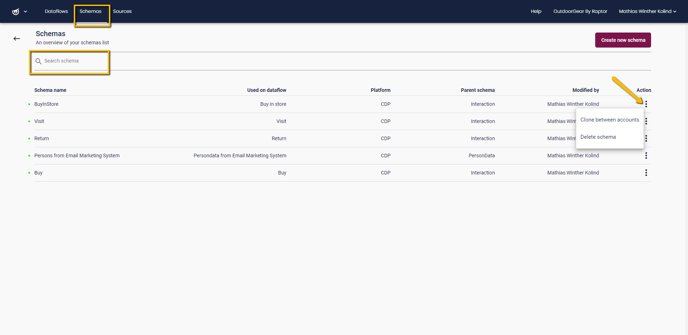
In addition to the name of each schema, the overview provides a variety of useful information.
- ‘Used in Dataflow’ will show whether the schema is currently in use, and if so, where. If the schema is used for two or more dataflows, the name of the first to use it is shown along with ‘+ others’, with a full list being displayed if this word is moused over
-
'Destination' and 'Schema Type' are selected during Schema Creation, and will be discussed below
-
‘Modified by’ and 'Last Modified' shows who created or last edited the schema, and provides a timestamp for when. If the source is listed as ‘System’, this denotes that it is one of the default schemas included by default.
1.1 Create a Schema
Hitting the ‘Create new schema’ button lets you make a new schema from scratch. This will take you to the Schema Creation screen.
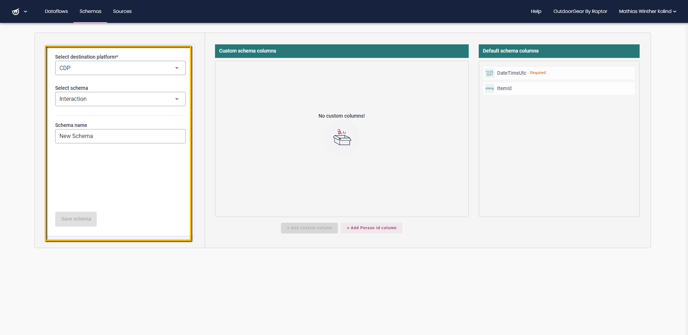
Depending on the schema-type selected, there may be one or more default-columns built into it – these cannot be edited or removed, and are necessary in order for the destination platform to use the data. A specific type of column may also be mandatory, such as a Person ID type column for a Customer Interaction type schema – for these, you will have a number of different options to choose from, but adding at least one of them to your schema is necessary before you can start adding custom columns.

⚠️ Warning: There is a limit of 100 columns in schemas created for the CDP as a destination platform.
🔍Note: Non-Customizable Schema for RecommendationEngine
If you select RecommendationEngine as the destination of a schema, you get two options - neither of which can be customized. RecommendationEngine requires some fairly specific inputs in order to function correctly, after all. Product Catalog is fairly straightforward, but the other option - Order Line - has some unique complexities. For more on this, see the Orderline Schema guide.
1.2 Destination
A key part of creating a Schema is selecting its Destination. This denotes which part of Raptor's system the rearranged data is supposed to arrive at, and each option will limit you to certain Schema-types. When the Schema is used in a Dataflow, that Dataflow will generally need to be set to the same Destination.
CDP: The Customer Data Platform can be considered the 'default' destination for a Schema. The resulting Dataflow can be used by the CDP in various ways, and thus there are also various options for Schema Type - allowing you to upload a Product Catalog, a list of Customer Interactions or a library of PersonData.
Recommendation Engine: For Dataflows that feed into the Recommendation Engine, providing more targeted advertisement. Only two Schema Types are available here, and neither can be customized since they need to 'fit' into the Recommendation Engine's algorithm. Firstly there's the Orderline Schema, meant primarily for point-of-sale data - for a more detailed guide to this Schema, see this. Second, there's a Schema for your Product Catalog, the use of which should be self-evident.
Search: This is for Dataflows that feed into the Site Search. Only one Schema Type is available - Search Schema, which is however highly customizable, featuring only two default columns. For more details on how to utilize this unique feature, see this detailed guide.
Merchandising: This is for Dataflows that feed into the Merchandising section - used for Boosted Campaigns and Customized Feeds. The only Schema Type it allows for is Product Catalog, though unlike the similarly-named Schema used for the Recommendation Engine, this one can be personalized with Custom Columns.
For more information on the Destination Overview and adding External Destinations, see this documentation.
1.3 Add Custom Columns
Assuming the selected Schema Type allows for it, custom columns can be added using the ‘+ Add custom column’ button. Each Schema can have up to 20 Custom Columns.
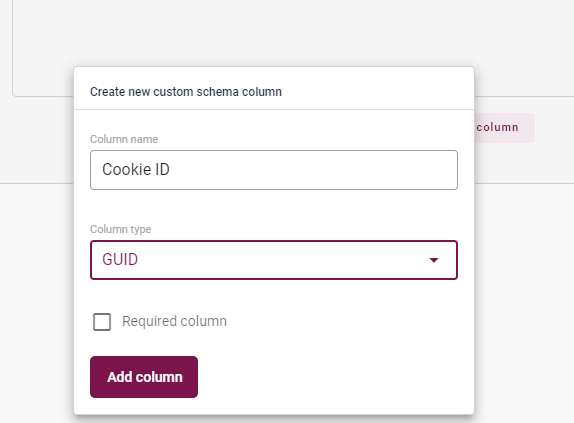
Here, you simply type in a name for the new column, and select what type of data it should contain. In the example above, we have added Cookie ID as a GUID. Optionally, the checkbox can be used to mark the new column as Required, making it mandatory when columns are mapped onto this schema during creation of the dataflow.
Custom columns can be edited or removed at any time, though required columns – such as the Person ID column needed for an Interaction-type schema – can only be deleted, and if so will need to be replaced by a different column that fulfills the requirements before the schema can be saved.
⚠️ Uncertain about what the various datatypes represent or are for? Give the Datatype Overview a look!
1.4 Edit a schema
Selecting a schema from the overview list allows you to use the creation-tool to edit it, albeit with certain limitations. The Destination Platform and Schema Type selection is locked in upon creation, and cannot be altered at any point afterwards.
The same applies even if the schema has been used in a 'Draft'-status dataflow - that is, you may still edit everything short of Destination Platform and Schema Type at this point. However, if the schema has been used in a published dataflow, edit-options are somewhat curtailed.
Under such circumstances, it will - naturally - not be possible to make any changes to existing columns. Nor can you add any additional Person ID columns or Required Columns, since this would cause conflict with existing uses with it. However, you can still change the schema's name, and add additional, optional, Custom Columns for use in future applications of the now-expanded schema.
1.5 Schema Types and Traits
There are several different schema-types available, each with their own properties. Here, then, is an overview of all the current options.
| Schema Type | Destination Platform | Append/Overwrite Default |
| Catalog | CDP | Append |
| Interaction | CDP | N/A |
| PersonData | CDP | Append |
| Orderline | Recommendation Engine | N/A |
| Product Catalog | Recommendation Engine | Overwrite |
| Product Catalog | Merchandising | Overwrite |
| Search | Search | Append |
2. Sources
The main role of Sources is as a tool for categorizing where the data comes from. A Source, in essence, is simply a name that is used to categorize the attached dataflow for searchability and easy access in a module such as the Customer Data Platform’s Audience Builder.
Creating a new Source is as simple as typing the desired name into the ‘Create new source’ field and clicking on ‘Save source’.
In the source overview, a search-feature is provided for filtering, and the overview shows name as well as who created the Source – and when. The ‘Used on Dataflow’ column, like in the Schema Overview, shows only the first to use it along with a ‘+ other’ line that can be expanded to a full list on mouseover.
Whether in use or not, a Source can be edited at any time - though of course, the only thing there is to edit is its name...